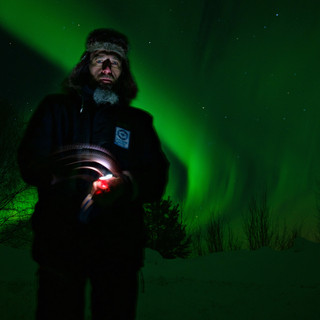
Aurora Borealis photography tips
- greg goudey
- Feb 15, 2025
- 5 min read
Updated: Nov 19, 2025
In my many years as an Aurora photographer, I have been asked about the best camera settings to use for sharp Aurora photos. In this blog entry, I'll list the settings that I typically use with my camera systems for capturing brilliant photos of the Aurora. I will also post some equipment recommendations that will help you immensely.
Assuming you already have a DSLR or mirror less interchangeable lens camera, let's start with some camera gear that will not only improve your aurora photography but may also be useful for other types of photography. I will keep the info as basic as possible in this blog so you will get the most pertinent information to get you started. There are many YouTube videos that dive much deeper into the mechanics of camera equipment and the physics of how lenses and cameras work.
LENS SELECTION:
Wide-angle and ultra-wide-angle prime lenses. In photography vernacular, wide-angle and ultra-wide-angle lenses refer to any lens with a focal length of 35mm or less. For example, a 20mm focal length is considered a wide-angle lens, and a 15mm lens is considered ultra-wide-angle. A prime lens means that the lens is fixed at one focal length (e.g., 24mm), whereas a zoom lens has multiple focal lengths (e.g., 24-70mm) within its zoom range.
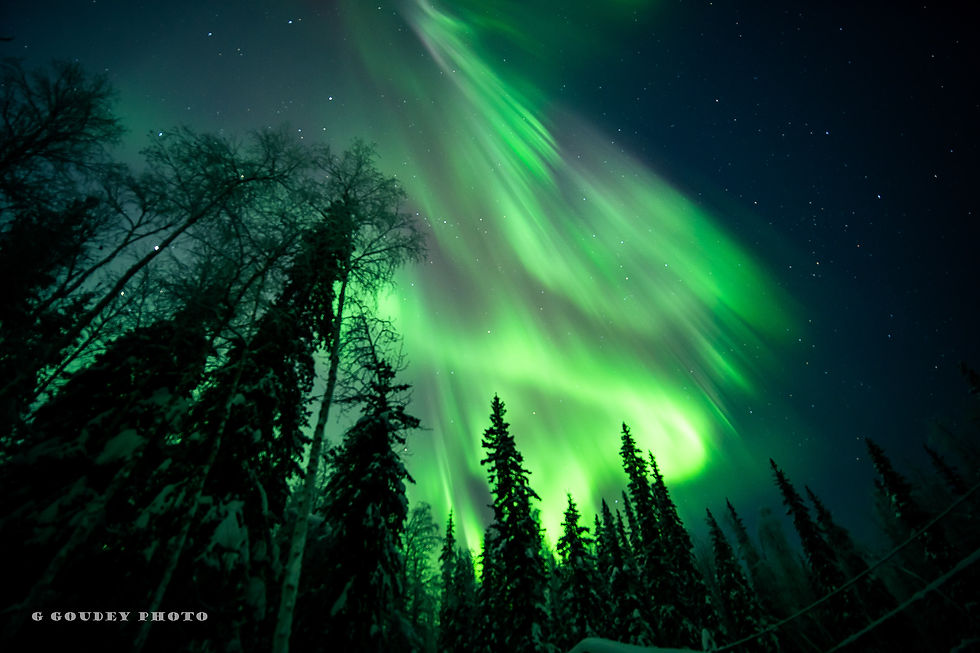
It is generally recommended to use a fast aperture, wide or ultra wide angle prime lenses when shooting the night sky. The fast aperture is best for letting in more light onto the camera sensor and the wider focal length captures a greater field of view which makes for those impressive aurora photos that show a large portion of the Aurora activity in the night sky. Aperture refers to how large the iris can open, the F STOP. On your camera lenses you will see numbers that read as f/2.8, f/4.5 and so on. The smaller that number value the faster the aperture is on your lens, f/2 for instance is considered a fast aperture.
ALWAYS USE A TRIPOD: (and a shutter timer)
No matter how steady you think your hands are, your nighttime photos may look blurry without the use of a tripod. When using longer shutter speeds, any movement of the camera can cause motion blur. Even if your camera has image stabilization, it's best to use a tripod. With a sturdy tripod, you won't have to hold your camera while waiting to see the aurora appear, and that is a big plus when standing out in the cold! I also recommend using a shutter timer if your camera has that function. The shutter timer allows you to pull your finger off the shutter button before the image is taken; this also helps reduce any motion blur. I typically use a 2-second shutter timer on my Sony Alpha cameras. Turning off the image stabilization on your camera body and lens is often recommended, as these features could also cause blurry images if they somehow try to correct any movement the camera might experience just before the shutter is released.
MANUAL FOCUS ONLY:
When taking photos of the night sky, you always want to use a manual focus lens or set your auto focus lens to manual focus. The reason is that most auto focus lenses struggle to get good focus in the dark. Learning to focus your lens manually will not only improve your nighttime photos but will also help you become a better photographer in general. When I set my manual focus lenses to capture the distant aurora in the night sky, I first turn the focus ring all the way to the infinity symbol and begin very slightly backing away from the infinity symbol while taking shots to check the focus in the camera viewfinder or the LCD display on the rear of the camera. Once I see that the stars and the aurora look crisp, I make a mental note or take a phone photo of where on the lens the sharpest hyper-focal distance value is. This is my simplest explanation of how to manually focus your lens for shooting the aurora. I could go more into what hyper-focal distance means, but I want to keep things as simple as possible for now. This info should get you started shooting pretty quickly!
ISO:
As simply as I can put it, ISO is a value that, in a sense, determines how sensitive to light your camera sensor will be based on the setting you use. For instance, ISO 1600 is somewhat of a high value. Higher ISO values help your camera amplify light in dark settings. Most modern cameras, especially mirror less cameras, can be set to very high ISO values. Keep in mind that too low of an ISO value will produce underexposed and grainy photos. Conversely, too high an ISO will create blown-out and grainy (noisy) photos. Setting the ISO value on your camera should also be determined by how many additional light sources are in your environment, such as the moon or street lights. I generally use an ISO range between 1000 and 2000.
SHUTTER SPEED:
The internet will generally tell you that using a long shutter speed (10 seconds or longer) is necessary to capture the Aurora, and while a longer shutter speed is needed, it is not always necessary to use longer than 4 - 6 seconds. I often use just a 2-second shutter when the Aurora is very bright and moving quickly. Most modern digital cameras have very light-sensitive sensors, and when paired with a fast aperture lens, one does not need extremely long shutter speeds. My recommendation is to start with a 6-second shutter speed and adjust it according to how well your camera freezes an image of the Aurora. If your shutter speed is too long, the Aurora and any stars in the sky will look blurry and out of focus. Again, if you have a fast aperture lens such as an f/2 or better, you can most likely use shorter shutter speed times as the lens aperture is helping get more light onto the camera sensor.
Now that I've covered some essential basics of photographing the Aurora Borealis, I'll wrap up by sharing a list of my camera equipment for shooting the Northern Lights.
Camera bodies:
SONY A7IV - full frame sensor
SONY A7II - full frame sensor
SONY A6000 - aps-c (cropped) frame sensor
My go-to Aurora lenses are:
Tokina - Firin 20mm f/2 MF (manual focus) for the Sony E Mount system
Venus Optics - Laowa 15mm f/2 MF for Sony E Mount
7 Artisans - 7.5mm F/2.8 FISH-EYE
Tripods:
Benro - FIT29A aluminum tripod
Benro - TSL08AN00 Slim aluminum tripod
SmallRig - AP-10 carbon fiber tripod
HAPPY SHOOTING!

This is a fantastic, no-nonsense guide. The tip about manually focusing just shy of infinity is crucial—so many beginners miss that and get soft stars. A sturdy tripod and a fast wide-angle lens are non-negotiable. For anyone compiling their aurora clips into a timelapse or reel, knowing how to add a countdown timer for video editing can create a really engaging intro. Solid advice all around!